 As the world of home recording continues to evolve, more and more musicians are choosing to create music from the comfort of their own homes. While this can be a rewarding and enjoyable experience, it's important to remember that many potential pitfalls and mistakes can derail your recording project.
In this article, we'll be taking a closer look at the top 10 home recording mistakes that musicians and producers make all too often. From technical issues like improper microphone placement and over-processing to creative missteps such as poor song selection and lack of preparation, we'll cover a wide range of common mistakes that can impact the quality of your recordings.
One of the biggest challenges of home recording is finding the right balance between technical proficiency and creative expression. On the one hand, it's essential to have a solid understanding of the technical aspects of recording, including microphone selection, signal flow, and mixing techniques. However, on the other hand, it's equally important to maintain a sense of creative freedom and spontaneity in your recording process so that your music doesn't become overly polished or formulaic.
Throughout this article, we'll explore how to strike that balance by identifying common mistakes and offering practical tips and solutions for avoiding them. Whether you're a seasoned recording veteran or just starting with home recording, this article will provide valuable insights and strategies for achieving better results and making the most of your recording projects. So, let's dive in and take a closer look at the top 10 home recording mistakes to avoid.
When it comes to home recording, one of the most common and detrimental mistakes is neglecting to consider the acoustic properties of your recording space. Poor room acoustics can significantly impact your recordings' quality, leading to unwanted noise, frequency imbalances and poor sound definition. To help you avoid this mistake, let's take a closer look at the ins and outs of room acoustics.
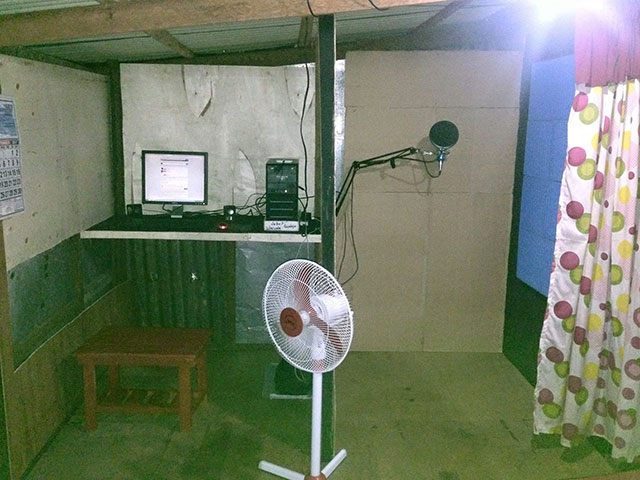 Room acoustics refers to how sound behaves within a given space. This is determined by various factors, including the shape and size of the room, the materials used in construction and the presence of objects or obstacles that can reflect or absorb sound waves. A room with poor acoustics typically has several problematic characteristics, such as excessive reverberation, standing waves, or uneven frequency response.
Some of the most common room acoustic problems that home recording enthusiasts encounter include:
The good news is that there are a variety of solutions to common room acoustic problems. Some of the most effective include:
By taking the time to understand room acoustics and address any issues in your recording space, you'll be able to achieve a more balanced, professional sound in your recordings.
Capturing the perfect sound is the goal of every recording engineer, and one of the essential tools in achieving this is the microphone. It's vital to use proper microphone techniques to ensure the recording sounds as good as possible.
 The importance of microphone technique cannot be overstated. Proper technique can make the difference between a flat and lifeless recording and one full of depth and character. Microphone technique encompasses everything from selecting the right microphone for the job to knowing the correct placement and angle. It's important to remember that the quality of the microphone can only take you so far. Knowing how to use it correctly is what truly separates professionals from amateurs.
One of the most common mistakes made when recording is incorrect microphone placement. Incorrect placement can result in an unbalanced mix or unwanted noise. One common mistake is placing the microphone too close to the source. This can produce an overly bright or harsh sound, especially on high-frequency instruments like cymbals or acoustic guitars. Conversely, placing the microphone too far away can result in a weak or muddy sound.
Another common mistake is using the wrong microphone for the job. A dynamic microphone on an acoustic guitar or a condenser microphone on a kick drum will result in a less-than-optimal recording. It's essential to understand the characteristics of different microphone types and select the right one for the job.
Correct microphone placement is critical to getting the best possible sound. The placement will depend on the type of instrument or sound source being recorded. For example, placing a microphone close to the center of a snare drum will capture the attack and punch of the drum, while placing it near the rim will capture more of the overtones.
In general, placing the microphone at a distance of around 6-12 inches from the sound source will provide a good balance of direct and ambient sound. This distance can be adjusted based on the specific sound being recorded.
Another important consideration is the angle of the microphone. For example, pointing a microphone directly at a guitar amplifier speaker cone will produce a harsh sound, while angling it slightly off-center can provide a more balanced sound.
Using the proper microphone techniques is essential to achieving high-quality recordings. This includes selecting the right microphone for the job, understanding the correct placement and adjusting the angle to capture the desired sound. You can capture the perfect sound every time by avoiding common microphone placement mistakes and following proper placement techniques.
When considering home recording, the quality of your cables can significantly impact the sound you capture. While it's easy to overlook the importance of cables, they play a vital role in transmitting the audio signal from your microphone or instrument to your recording equipment.
Before diving into the importance of using high-quality cables, let's look at the cables commonly used in home recording. There are several types of cables that you may encounter, including XLR, TRS and RCA. XLR cables are typically used for microphones and offer a balanced signal, making them less susceptible to interference and noise. TRS cables are generally used for connecting audio interfaces, mixers and other audio equipment. RCA cables are often used for connecting consumer audio devices, such as CD players and turntables.
Using high-quality cables is crucial to ensure that you capture the best possible sound in your home recordings. Cheap or low-quality cables can introduce noise, interference and other issues that can degrade the quality of your recordings. High-quality cables are made with better materials and are built to higher standards, which means they can better preserve signal integrity and reduce noise and interference.
Recognizing the signs of cable problems is essential to ensure you get the best sound quality in your recordings. One of the most common signs of cable problems is a buzzing or humming sound, which can indicate interference or a faulty cable. Another issue you may encounter is crackling or popping sounds, which can indicate a problem with the cable's connectors. If you notice any of these issues, it's important to troubleshoot the problem by swapping out the cable or checking for loose connections.
In summary, high-quality cables are essential to achieving high-quality recordings at home. Understanding the types of cables used in home recording, the importance of using high-quality cables and recognizing signs of cable problems can help you achieve the best possible sound quality in your home recordings.
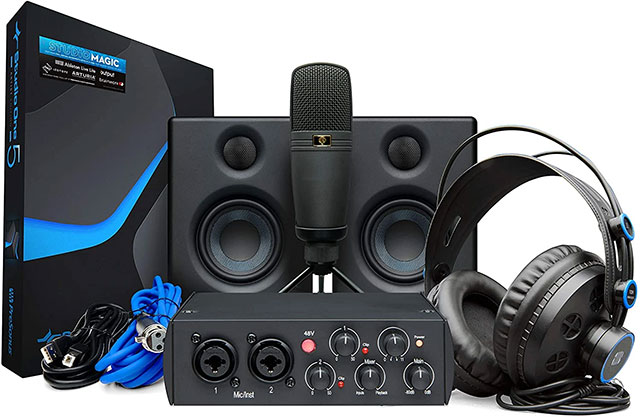
If you're a home recording enthusiast, chances are that you have invested a significant amount of time and effort into perfecting your craft. However, your efforts may be unsuccessful if you use low-quality gear. The equipment you use significantly impacts the quality of your recordings, and using low-quality equipment can severely limit the potential of your recordings.
Quality gear is essential for any recording session. It ensures that the sound captured is as accurate and detailed as possible. This is especially important in home recording, where the environment may not be acoustically treated. Using high-quality gear can help compensate for these acoustic limitations and ensure that your recordings are of professional quality.
Moreover, high-quality gear can also increase the lifespan of your equipment. Cheap gear may be susceptible to wear and tear, leading to frequent breakdowns and repairs. This can be a major headache and can disrupt your workflow.
Low-quality gear can be identified in several ways. The most common sign is poor sound quality. If your recordings sound muffled or distorted, it may indicate that your gear is not up to par. Another sign of low-quality equipment is noise. If your recordings have a lot of background noise or hiss, it may indicate that your equipment is not shielding the sound correctly.
Other signs of low-quality gear may include flimsy build quality, poor connectivity and limited functionality.
 Upgrading to higher-quality gear can seem daunting, especially if you're on a budget. However, it's not impossible. The first step is to identify the equipment that you need to upgrade. This can be done by identifying the weakest links in your recording chain. This may include microphones, preamps, or monitors.
Once you have identified the gear that needs upgrading, the next step is to research the best options available within your budget. Many online resources can help you with this, such as gear reviews, forums and blogs.
If you're on a tight budget, consider buying used gear. Several online marketplaces are available to find high-quality used equipment at affordable prices. However, make sure you do your due diligence and research the seller before purchasing.
Overall, using low-quality gear can severely limit the potential of your recordings. Investing in high-quality equipment is essential for any home recording enthusiast. By identifying the weakest links in your recording chain and upgrading to higher-quality equipment, you can ensure that your recordings are of professional quality.
As the saying goes, "What you see is what you get." This is especially true when mixing and mastering audio, and it's essential to use calibrated monitors to achieve the best possible results. Unfortunately, this is a mistake that many home recording enthusiasts make.
Monitor calibration refers to adjusting a monitor's frequency response and other settings to accurately represent the sound being produced. This is crucial because different monitors can have varying frequency responses, which can result in an inaccurate representation of the sound. Calibration ensures that what you hear accurately represents what has been recorded.
One common mistake people make when it comes to calibration is failing to calibrate their monitors. Without calibration, you cannot be sure that the sound you're hearing is accurate. Another common mistake is not considering the room acoustics, which can affect the sound of the monitors. Finally, some people make the mistake of using software to calibrate their monitors instead of a hardware calibration tool.
To calibrate your monitors correctly, you'll need a hardware calibration tool. These tools measure the frequency response of your monitors and create a correction curve that compensates for any inaccuracies. You should also consider the acoustics of your room and adjust the placement of your monitors as necessary. For example, you should avoid placing your monitors in corners, as this can result in an inaccurate representation of the sound.
Overall, not calibrating your monitors is a mistake that can lead to inaccurate sound and poor mixing and mastering results. By taking the time to calibrate your monitors correctly and taking into account the acoustics of your room, you can ensure that what you hear is an accurate representation of the sound you're recording and mixing.
In music production, compression is a tool that helps control a track's dynamic range. It reduces the volume of the loudest parts of the track, allowing the quieter parts to be heard more clearly. While compression is a valuable tool, it can also be overused, resulting in a compressed and lifeless sound.
Compression is a process that reduces the dynamic range of an audio signal. It does this by reducing the volume of the loudest parts of the track while leaving the quieter parts untouched. This results in a more consistent volume level, making it easier to hear all the parts of the track.
The most common mistake when using compression is over-compression. This occurs when the volume reduction is too high, resulting in a squashed and lifeless sound. Another mistake is using compression to fix a bad recording rather than address the recording's underlying issues.
To properly use compression, it's important to first understand the track's dynamic range. You should aim to reduce the volume of the loudest parts of the track while still maintaining the overall dynamics. A good starting point is setting the compression threshold so that it's just touching the track's peaks. From there, you can adjust the attack and release settings to control how quickly the compression kicks in and how quickly it releases.
It's important to use compression in moderation and always be mindful of the track's overall sound. If the track sounds overly compressed or lifeless, it's time to dial back the compression and reevaluate the mix.
By using compression properly, you can enhance the dynamic range of your tracks and make them sound more polished and professional.
 Recording levels are an essential aspect of home recording; setting them correctly is crucial to achieving a balanced and professional-sounding mix. However, many home recording enthusiasts often overlook this aspect, resulting in recordings that are either too low or too high in volume, leading to distorted or noisy audio.
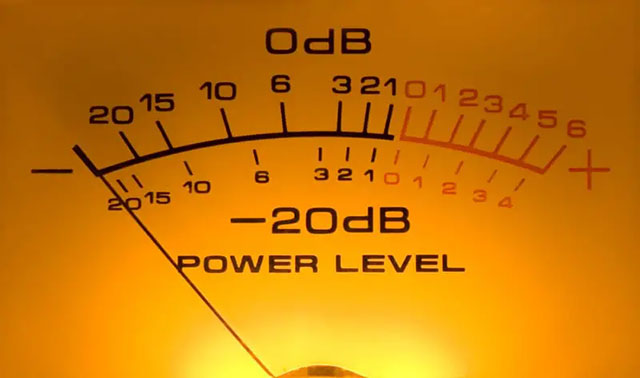
The recording level measures the audio signal's strength as it enters the recording device, typically measured in decibels (dB). Proper recording levels ensure that the audio signal is neither too weak nor too strong, preventing distortion, noise, or other audio artifacts that can compromise the quality of the recording.
Recording levels that are too low can lead to weak, thin-sounding audio that can be difficult to hear, even when boosted during mixing. On the other hand, recording levels that are too high can cause audio clipping, where the audio waveform is clipped at the top, resulting in harsh, distorted audio that cannot be fixed in post-production.
One of the most common recording level mistakes is setting levels too low. This often happens when the recording level is set using visual cues alone, such as the level meters on the recording software, without monitoring the audio signal's quality. The result is often a recording with low volume and weak, thin-sounding audio.
Another common mistake is setting levels too high, which can result in clipping. This distortion occurs when the audio signal exceeds the maximum level the recording device can handle. Clipping can damage the recording and make it impossible to salvage in post-production.
Using visual and auditory cues to set proper recording levels is essential. First, set the recording level using visual cues, such as the level meters on the recording software, as a starting point. However, to ensure that the audio quality is not compromised, it's crucial to monitor the audio signal's quality through headphones or studio monitors while recording.
Adjust the recording level while monitoring the audio quality until you balance the desired level and the quality of the recording. It's also essential to ensure that the recording level doesn't exceed the maximum level the recording device can handle to avoid clipping. A good rule of thumb is to leave at least 3dB of headroom, the space between the highest level of the audio signal and the maximum level the recording device can handle.
In summary, setting proper recording levels is crucial to achieving high-quality recordings. Avoid setting levels too low or high, monitor the audio quality while recording and leave at least 3dB of headroom to avoid clipping. With proper recording levels, you can achieve a balanced and professional-sounding mix.
Editing and mixing are two of the most critical aspects of producing high-quality recordings. A poorly edited or mixed track can ruin the final product even if you've done everything else correctly. Good editing and mixing can make the difference between a mediocre recording and a professional-sounding one. Editing involves cutting and arranging audio tracks to create a cohesive composition. Mixing consists of balancing the levels and frequencies of the different tracks, applying effects and creating a sense of space and depth in the recording.
One common mistake in editing is over-editing. This can result in unnatural-sounding recordings that lack a live performance's natural ebb and flow. Another mistake is not taking the time to align tracks properly, resulting in phasing issues that can make a recording sound muddy or unclear.
In mixing, a common mistake is not properly balancing the levels of the different tracks. This can result in certain recording elements being too quiet or loud, leading to a lack of clarity and definition. Another mistake is over-applying effects such as reverb or compression, which can make a recording sound messy and cluttered.
It's essential to focus on the natural ebb and flow of the performance to improve your editing. Use cuts and transitions that are natural and not jarring to the ear. Take the time to align tracks properly to avoid phasing issues.
For mixing, it's essential to balance the levels of the different tracks to create a clear and defined sound. Be careful not to overuse effects such as reverb or compression and use them sparingly to create a more natural and spacious sound. It's also important to listen to the recording on many systems to ensure it sounds good on all of them.
Overall, good editing and mixing are essential for producing high-quality recordings. By avoiding common mistakes and taking the time to edit and mix your tracks carefully, you can create professional-sounding recordings that listeners will enjoy.
When recording audio, unwanted noise such as hum, hiss, or buzz can be picked up by the microphone and recorded along with the intended audio. This noise can be distracting and affect the overall quality of the recording. That's where noise reduction comes in.
Click here to try our free online Audio File Denoiser.
Noise reduction is a process used to remove unwanted noise from a recording. It involves using software or hardware tools to analyze the audio and remove unwanted noise while preserving the quality of the intended audio.
One common noise reduction mistake is applying too much reduction, which can result in a processed sound and cause a loss of detail in the intended audio. Another mistake is using a noise reduction tool inappropriate for the type of noise being removed, which can result in ineffective noise reduction.
To properly use noise reduction techniques, it's essential to identify the type of noise in the recording. For example, hum can be caused by electrical interference, while hiss can be caused by microphone or preamp noise. Once the type of noise is identified, a noise reduction tool appropriate for that type of noise can be used. It's also essential to use the noise reduction tool sparingly and avoid applying too much reduction, as this can result in a processed sound. It's recommended to use a noise reduction tool in combination with other techniques, such as proper microphone placement and room acoustics, to minimize the amount of noise that needs to be removed.
In summary, neglecting noise reduction can result in distracting and unwanted noise in a recording. However, using noise reduction techniques properly and sparingly is essential to avoid a processed sound and loss of detail in the intended audio. Correctly identifying the type of noise and using appropriate noise reduction tools can effectively remove unwanted noise and improve the overall quality of a recording.
Feedback and criticism are vital aspects of any creative process, especially in music production. Ignoring feedback and criticism can lead to a stagnant creative process and a lack of growth in skills.
 Feedback and criticism are essential to improving skills and refining creative ideas. They provide insight into how others perceive our work and allow us to see areas that need improvement. Accepting and utilizing feedback can lead to new and innovative ideas and can help to push boundaries in music production.
One common mistake when accepting feedback is taking it personally. It's important to remember that feedback is not a personal attack but an opportunity for growth. Another mistake is dismissing feedback without consideration or not applying it in practice. Evaluating feedback carefully and determining its usefulness in the creative process is essential.
To better accept feedback and criticism, it's essential to have an open mind and not be defensive. Take the time to listen to the feedback and evaluate its merit. Ask questions, seek clarification if necessary, and take notes to remember and apply the feedback in practice. It's also important to seek feedback from many sources to gain a diverse perspective and continue to grow and develop as a music producer.
Overall, ignoring feedback and criticism can harm growth and development in music production. By understanding the importance of feedback and criticism, avoiding common mistakes and utilizing tips for better acceptance, music producers can continue to refine their skills and produce high-quality music.
In this article, we've covered the top 10 home recording mistakes that many beginners make. We started by discussing the importance of selecting the right room and creating an optimal recording environment, followed by the significance of choosing the right microphone and avoiding common microphone mistakes. We then discussed using the right cables, avoiding low-quality gear, calibrating monitors, and correctly using compression and noise reduction techniques. Finally, we discussed the importance of accepting feedback and criticism.
It's crucial to avoid these mistakes to achieve high-quality home recordings. Learning and implementing proper recording techniques will save you time, money and frustration in the long run.
In conclusion, we recommend that you make a conscious effort to avoid these mistakes and invest in learning proper recording techniques. Whether you're a beginner or an experienced home recording artist, it's never too late to improve your skills and produce higher-quality recordings. With the right equipment, proper recording techniques and a willingness to learn and grow, you can achieve your goals and create recordings that you're proud of.