Blog
Top 50 Best Audio Mastering Tips
 Audio mastering is the process of preparing a final audio mix for distribution. This involves adjusting and optimizing various aspects of the audio, including levels, equalization, compression and more. The goal of audio mastering is to create a cohesive and polished sound that will translate well across various playback systems.
Audio mastering is an essential step in the music production process. Even the best recordings can sound flat, unbalanced, or distorted without proper mastering. Also, mastering can help enhance a track's overall loudness, making it stand out in a competitive market.
This article will explore the top 50 best audio mastering tips to help you achieve a professional and polished sound in your music productions. We'll cover everything from preparing your mixes for mastering to specific techniques for enhancing your tracks' clarity, depth and loudness. Whether you're a seasoned audio engineer or just starting, these tips will help you take your music to the next level. So, let's dive in!
General Mastering Tips
- Check the track start. Ensure there are no unwanted pauses or noises before the music begins, but avoid trimming the track so tightly that every breath or sound before the music starts is cut away. Generally, the music waveform should start 50 - 500 ms after the beginning of the sample. This start is usually shorter for pop/rock and longer for classic tracks.
- Check the track end. Make sure it isn't cut too early, especially if there's some ambiance or delay at the end and use a nice fade-out, even if it's only for the background noise.
- On many pop/rock tracks, there is a longer fade out on the chorus. It's always better to do this at the mastering stage and not the mixdown; otherwise, you might get digital noise at the end of the fade-out.
- With fade-ins and outs, exponential and logarithmic curves sound more musical than linear ones. Use inverted S-curves for longer fade-outs.
- Adjust the track volume and L-R balance in relation to the other tracks. Check that the L and R channels have about the same peak and RMS levels and that the track has the correct loudness relative to the others.
- You should never normalize every track on an album. By doing this, the level of a quiet track would be boosted much more than a loud one, and the soft track would end up sounding louder/closer than the loud one.
- Adjust subtle differences in balance between the different frequency ranges with a mastering EQ (see EQ tips below).
- Adjust the stereo width using a stereo imager or a psychoacoustic processor if the track sounds too narrow or too wide.
- If you're having trouble refreshing a dull recording, use a bass/treble enhancer or exciter carefully, but try with the EQ first.
- If you want to remove undesired tape hiss, try a denoiser, possibly with a "fingerprint" function, to identify the exact spectrum of the noise to be removed. Carefully check that you don't cut crucial high-frequency parts of the signal. It's better to be noisy than dull.
- Adjust the dynamic range if it doesn't fit the final medium and/or the final listening environment. You want to avoid the listener adjusting the volume constantly, as some parts are too quiet and some too loud.
- Compare the overall sound with other productions, such as reference CDs, to ensure you're within the range of possible variations.
Loudness Tips
 If you can't get your master to the desired volume, try scooping out some of the low mid ranges. It can be tough to get loud if you're heavy between 400-800Hz. Try cutting on individual layers throughout your mix and think about all that added headroom you can create with minor, efficient cuts.
- Watch out for troublesome areas when you master. Slight EQ dips around 250Hz, 1000Hz, 4000Hz and 12000Hz can make a massive difference in how clean your track sounds when played loud.
- Using a reference is essential, but using a reference for specific parts of the frequency spectrum is even more critical. Only solo the parts of a reference you're trying to match, then use all of your mixing and mastering tools to recreate that section in your track. To get the best result, solo your reference below 200Hz, do the same to your track and keep working until they sound the same.
- If your master lacks sparkle, try boosting the sides above 7000Hz in the master. This will make the track feel bigger and brighter without being as hard on the ears as a traditional EQ boost. You can also cut the lows from the sides below 150-200hz to clean up muddiness.
- Automate the volume going into your drop to help increase the punch and impact of the drop. Try automating the master volume before the limiter during buildups. Try a combination of volume, EQ & reverb automation on your build. Use volume dips, low cutting with EQ and automating the reverb wetness up.
- Excitement is critical when mastering. As well as exciting the high-end, try exciting the lows for some added warmth. You can even use a mid/side exciter to have ultimate control over your master. Exciting the sides can be done much more aggressively than the mids in the higher bands.
- Always check your master on every sound system you can find. Take exports/bounces to your car and judge your master with detailed note-taking. Getting the desired results can often take at least 2 or 3 attempts.
Equalizer (EQ) Tips
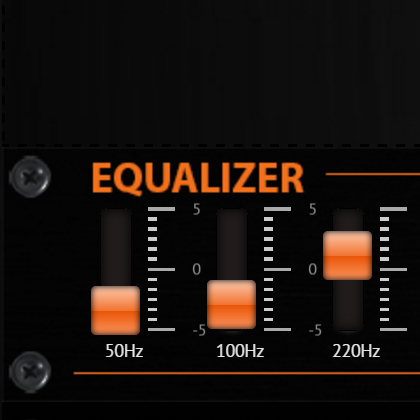 When adjusting the low frequencies, too little makes recordings sound thin and weak, while too much makes them sound boomy and distorted on most speaker systems. You can use a mild low shelving filter or a wide peak parameter EQ centered around 50 Hz to get the right results.
- On the other hand, when adjusting the high frequencies, too little makes recordings sound dull and unclear, especially at low volumes, while too much makes them sound harsh and unpleasant, especially at high volumes. Again, you can use a mild high shelving filter or a wide peak parameter EQ centered around 16 kHz.
- Check the balance between the bass frequencies and the high ones. In rock/pop/electronic music, the usual difference between the loudest bass frequencies (50 - 100 Hz approx.) and the high frequencies (approx. 10 kHz) is 30 - 40 dB. If the spectrum analyzer shows a difference of less than 30 dB, the track can sound quite aggressive, harsh and thin. However, if it shows a difference of more than 40 dB, the track can sound warm but a little muddy and dull.
- If you want more power, try boosting 16 - 60 Hz, but listen with a system that responds down to 16 Hz or with good headphones. Otherwise, you might push it too far! Remember that energy in this range can "chew up" a lot of the available dynamic.
- If you want more BD punch, try boosting 50-60 Hz.
- If the bass is too loud, try cutting 100-150 Hz.
- Try cutting the 200-250 Hz range if the sound is muddy. Muddy sound is more apparent if you listen on small multimedia speakers or portable audio.
- If the general sound lacks a warm, full quality, try boosting the 250-400 Hz range. Alternatively, you can cut this range if the available sound is muddy.
- If the vocals get lost in the mix, try enhancing the range where the vocals have the most power (800 Hz - 1,5 kHz).
- Try reducing the 2.5 - 4 kHz range if the guitar sounds too sharp.
- If the mix isn't clear (you want more transparency), try boosting the 2-3 kHz range. Be careful though, because the human ear is most sensitive to the 2-4 kHz range. If you boost this range too far, it can become tough to listen to or even cause hearing damage at high volumes.
- If you want more focus or impact from the vocals, try boosting around 5 kHz but take care of the "S".
- If the "S" and "T" are too sharp, try cutting the 6-7 kHz range or use a de-esser. However, it's better to use a de-esser during the mixing process and, even better, not to position the microphone directly in front of the singer when recording.
- If the
percussion sounds harsh and metallic, try cutting 10 kHz and boosting over 12-15 kHz slightly. This produces a more elegant sound
- If you want more spark and finish from a recording, try adding some air with shelving at 16 kHz.
- It's often better to use phase linear EQs. They won't modify the shape of low-frequency waveforms that would reduce headroom and/or cause clipping. However, be careful using phase linear EQs, because they can sometimes cause an annoying pre-ringing, a percussive sound that quickly fades in before the hit.
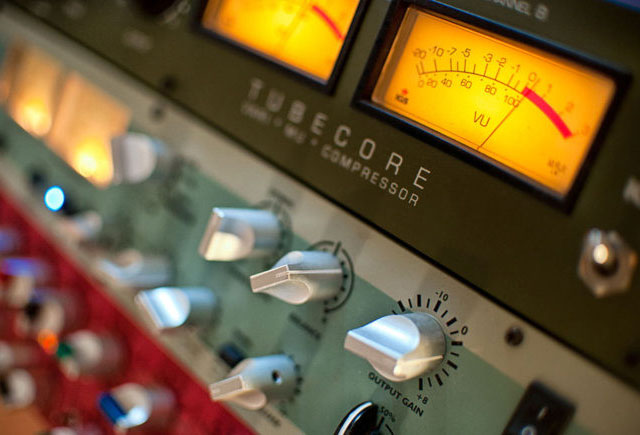
Compressor Tips
 Suppose the overall dynamic range (the difference between quietest and loudest passages) is too wide. In that case you can use a compressor at moderate compression ratio (1:1.2 to 1:1.6), relatively low threshold (-20 or even lower) and soft knee, to adapt the overall dynamic range of the recording to the final delivery platform, such as streaming or CD.
- If the signal peaks are too loud, try controlling them using a compressor with a high ratio (1:2 to 1:4), high threshold (-10 or higher), hard-knee and fast attack/release times. It's also an option to use a limiter instead.
- If you want to adjust the level of different song parts, such as the intro, use a volume curve instead of a compressor.
- Classical and jazz tracks often use minimal compression in mastering, especially if they already have compression on single channels and groups during mixing. Tracks such as pop, rock and dance often need additional sum compression but don't overdo it. If you do, it can sound terrible over the radio, where lots of compression can be added and it will lose all of its punch.
- If you have an excellent analog compressor and AD/DA, you can go in and out of your DAW using that instead of your favorite plugin.
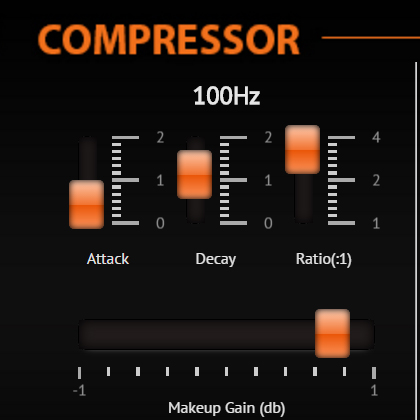
- The mastering process wouldn't be complete without multi-band compression. This allows you to control compression across different frequencies in your track. You can set attack, decay, ratio and makeup gain across multiple bands. They help you reach a higher perceived volume without distortion when used correctly.
- They also can be used instead of a traditional EQ to balance lows, mids and highs in a track.
Limiter Tips
 The Limiter should be the last effect in your master bus chain. Use it to control short peaks and avoid clipping of the signal.
- Set the maximum level as -0.1 or -0.2 dB FS, because some older DA converters cause distortion if the signal reaches 0 dB FS.
- If you use limiting up to 2-3 dB limiting, this is virtually undetectable and will give you more loudness. However, check that the loudest passages have no distortion.
- To avoid audible pumping artifacts, set the release time as short as possible. However very short release times can sometimes cause unwanted distortion.
- Avoid clipping on the master out. Don't try to boost your track's volume to the loudest level, but aim instead for the best sound quality at the loudest level without distortion or clipping.
- If you're looking for an aggressive sound (such as drums) during mixing, it can be a good option to have clipping on single tracks while keeping other tracks (such as vocals) clean. In other words, single track clipping or even drum/
percussion clipping is fine, but avoid master out clipping.
- Moderate clipping is sometimes used instead of limiting when mastering through analog effect chains. Although this can sound fine on high-end AD converters, it often sounds bad on cheap ones.
- As in mixing, remember some things can't be fixed by Mastering. In the next section, let's look at some examples of problems Mastering can't fix.
Mastering can't fix everything
Music mastering is an essential process in the music production pipeline that involves preparing and optimizing recorded tracks for distribution. However, it can't fix problems with a track's original recording, arrangement, or mix. It's vital to address these issues before mastering to ensure the best possible sound quality. Examples include:
- If you have two instruments in the same frequency range and one is too loud or too quiet, there is very little you can do to rectify it.
- If the bass is too loud and covers the bass drum, nothing can bring this bass drum back to life and make it punchy. However, if the bass drum is too loud and the bass is too quiet, you could try to compress the bass drum and increase the bass (low-level) signal.
- If the mixdown was already distorted or clipped, it's almost impossible to fix this later in Mastering. In this case, you'll need to redo the mixdown.
Conclusion
This article has discussed our top 50 best audio mastering tips to help you achieve a professional and polished sound in your music productions. From organizing your tracks to utilizing specific techniques for enhancing clarity, depth and loudness, these tips will help you take your music to the next level. We've explored the importance of audio mastering and the various tools and techniques that can be used to achieve a cohesive and balanced sound. Following these tips, you can create music that sounds great across various playback systems.
As you continue to develop your audio mastering skills, it's important to remember that the process is both an art and a science. While there are many technical aspects to consider, such as levels, EQ and compression, creativity and experimentation are also involved. Don't be afraid to try new things and explore different approaches to mastering. Additionally, it's essential to use high-quality tools and equipment and invest time learning how to use them effectively.
Remember, mastering is an ongoing process, and there's always room for improvement. Following the tips outlined in this article and continuing to learn and experiment, you can take your music productions to new heights. So take these tips and techniques and make some great music!